Upload an Audio, Font, or Image File for Kiosk Workflows
Use the following steps to upload a custom audio file, font file, or image file, for use in a kiosk terminal workflow. After a file is uploaded, it can be configured for a kiosk terminal workflow. Note: A single media file can be configured for use in multiple workflows.
Warning: Organizations should consult an attorney to verify all custom media (audio, fonts, and images) are properly licensed and available for use before adding it.
Tools Required
The following font, audio, and image file formats can be uploaded for use in kiosk terminal workflows.
- Audio File Format: MP3
- Font File Format: TTF
- Image File Formats: PNG, JPEG, JPG, GIF
Steps
Use the following steps to open the panel to upload custom media files, and then upload audio files, font files, or image files.
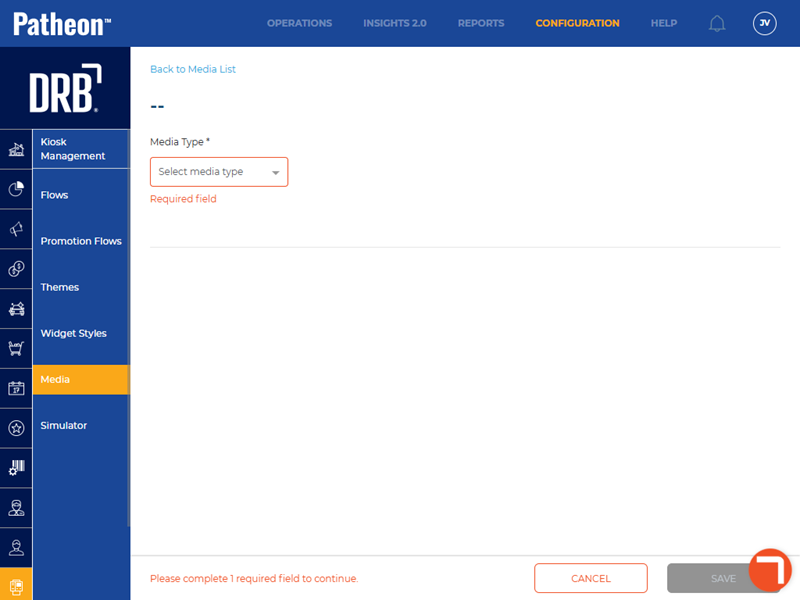
Open the MEDIA DETAILS Panel
- Log In to Patheon Portal.
- Select .
- Select Kiosks. The flows list panel opens.
- Select Media. The media list panel opens.

- Select . The media details panel opens.
Add an Audio File
Use the following steps to upload a custom audio file.
- In Media Type*, select Audio.
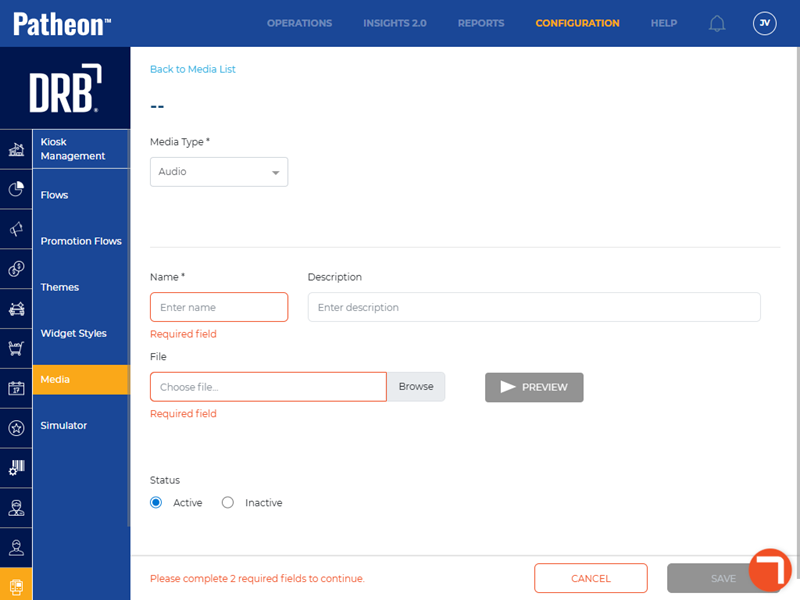
- In Name*, enter the name to assign to the audio file.
- In Description, enter text that provides more information about the audio file.
- In File, select Browse. The Open file explorer dialog opens.
- Navigate to the audio file (MP3) to upload, and select it.
- Select Open. The Open dialog closes and the file name is entered in File.
- Optionally, select to play the audio file and verify it is the correct file.
- In Status, select Active.
- Select . The file uploads, the Media Details panel closes, and the media list panel opens.
Add a Font File
Use the following steps to upload a custom font file.
- In Media Type*, select Font.
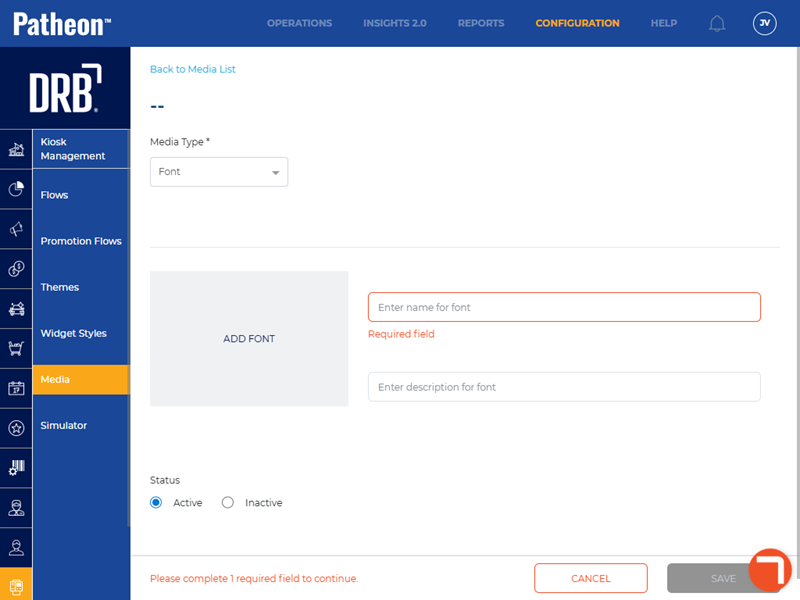
- Select . The Open file explorer dialog opens.
- Navigate to the font file (TTF) to upload, and select it.
- Select Open. The Open dialog closes, the font name automatically appears in Name (it can be edited), and a preview of the font is provided for the following text: The quick brown fox jumps over a lazy dog. Note: An edit function is available to open the Open file explorer dialog to select a different font, and a Remove Font function is available to remove the selected font from the preview.
- In Status, select Active.
- Select . The file uploads, the Media Details panel closes, and the media list panel opens.
Add an Image File
Use the following steps to upload a custom image file.
- In Media Type*, select Image.

- Select . The Open file explorer dialog opens.
- Navigate to the image file (PNG, JPEG, JPG, GIF) to upload, and select it.
- Select Open. A Crop Your Image dialog opens, with a preview of the selected image.
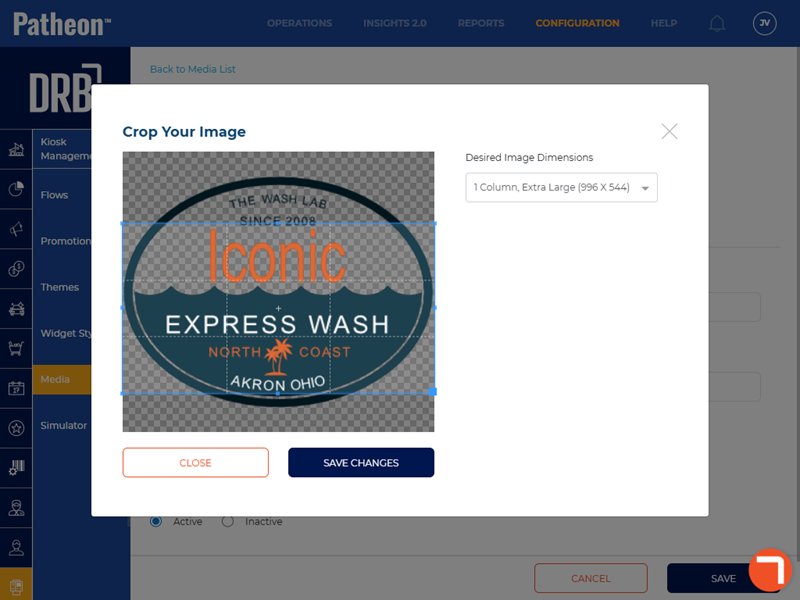
- In Desired Image Dimensions, select the dimensions (Description (WIDTHxHEIGHT)) that correspond to the image's intended use.
- Use the crop borders to crop the image as necessary.
- Select . The Crop Your Image dialog closes, the Media Details panel opens, and the image name automatically appears in Name*. Note: The image name can be edited.
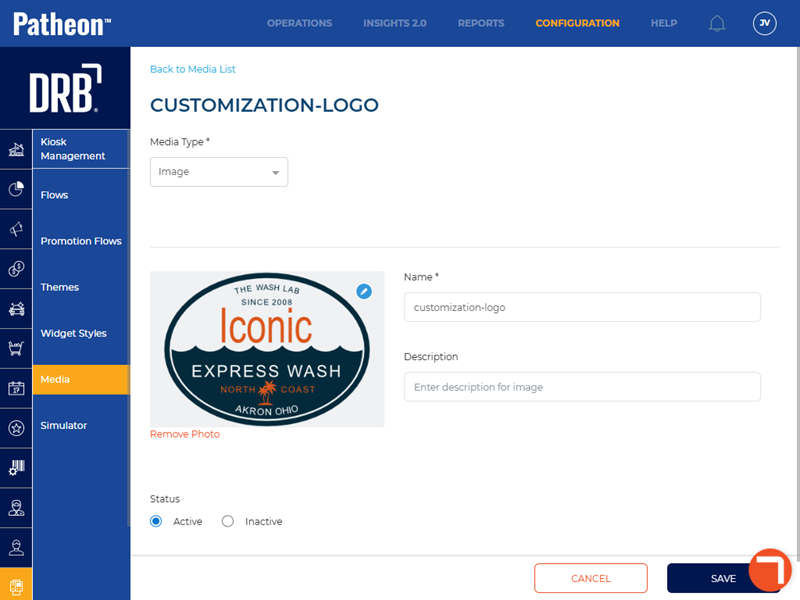
- In Description, enter the image's dimensions from the Crop Your Image dialog, for example, Background 1024x768.
- In Status, select Active.
- Select . The file uploads, the Media Details panel closes, and the media list panel opens.