CREATE FLOW (FLOWS)
The Create Flow panel opens when the function is selected from the FLOWs List panel. It is used to configure a new kiosk workflow.
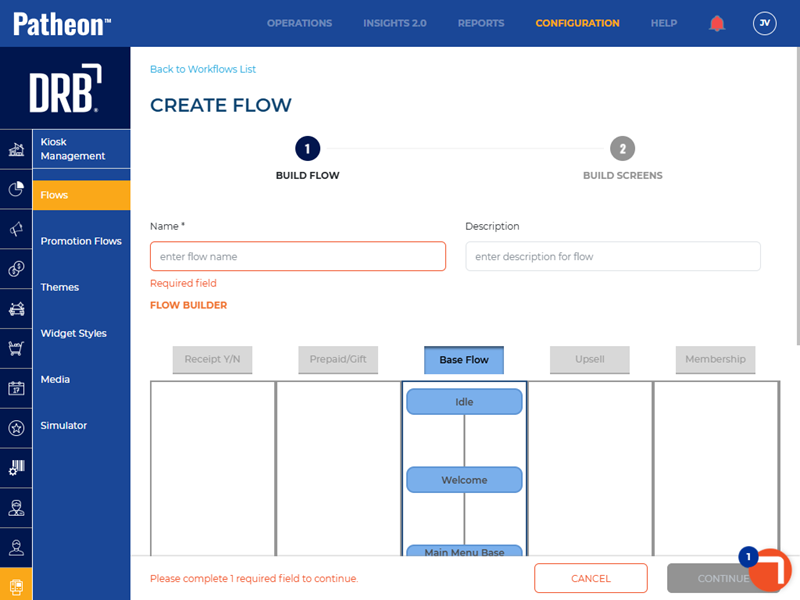
1 BUILD FLOW
Name*
Name of the workflow.
Description
A user-configured summary of the workflow.
FLOW BUILDER
Patheon provides five flow options. The Base Flow is the default selection. Use the toggle to include or remove flow options.
Receipt Y/N
Prompts users to choose whether they would like to receive a receipt after completing a transaction.
Prepaid/Gift
Allows users to purchase prepaid cards or gift vouchers. Users are prompted to select the type of prepaid or gift option they wish to buy. Once the transaction is finalized, the kiosk provides the user with a physical card or a digital code.
Base Flow
The default kiosk flow. The flow begins with a welcome screen that invites users to choose a service or product. After making a selection, users navigate through various menus, such as browsing items, viewing details, and adding products to their cart. The flow continues to the payment screen, where users can choose their payment method and confirm the transaction.
Upsell
Suggests additional products or services that compliment users' initial selection.
Membership
Facilitates the process of signing up for a membership program. If a user signs up for a membership, the kiosk prompts users to enter and review their personal information and agree to the terms and conditions before finalizing their membership.
2 BUILD SCREENS
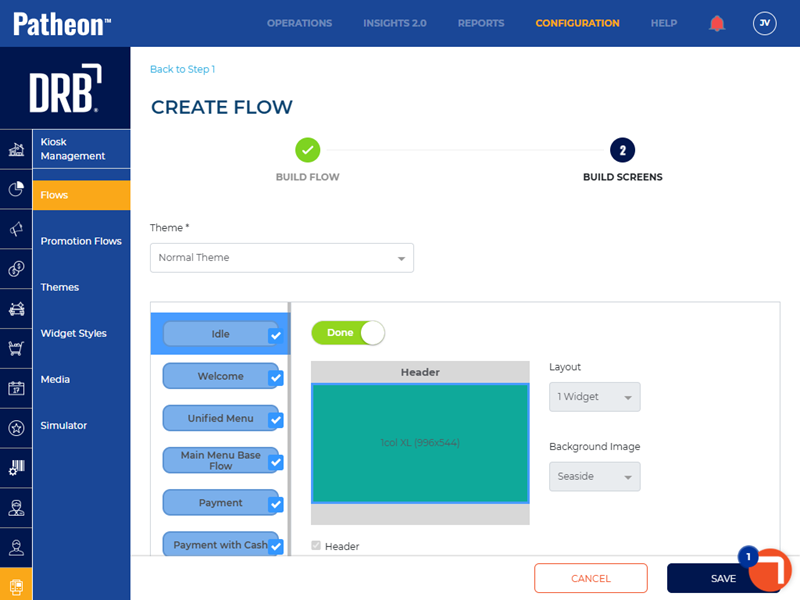
Theme*
Theme to be applied across all interface elements.
Screens
WIP

This toggle indicates that the flow is still a work in progress. Once the user is finished creating the screen layout, select the toggle to change its status to Done.
Idle
The default display that appears when the kiosk is not in active use, showcasing promotional content, branding, or useful information to engage users and encourage interaction.
Welcome
The initial interface presented to users upon interaction, designed to greet them and provide clear navigation options.
Layout
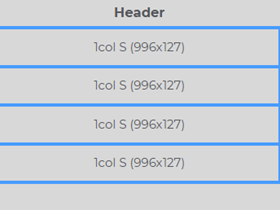
Patheon provides 12 (twelve) layout options. The layout thumbnails display the image dimensions for each widget.
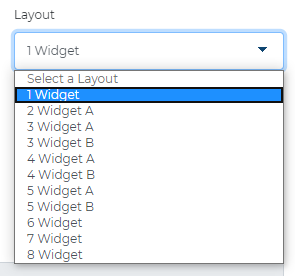
1 Widget

1col XL dimensions
- Width: 996 pixels
- Height: 544 pixels
2 Widget A
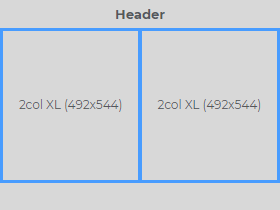
2col XL dimensions
- Width: 492 pixels
- Height: 544 pixels
3 Widget A
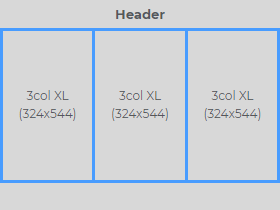
3col XL dimensions
- Width: 324 pixels
- Height: 544 pixels
3 Widget B
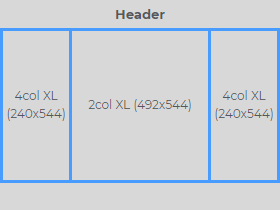
4col XL dimensions
- Width: 240 pixels
- Height: 544 pixels
2col XL dimensions
- Width: 492 pixels
- Height: 544 pixels
4 Widget A
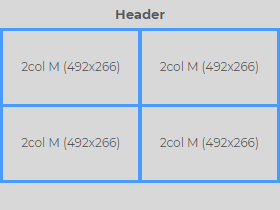
2col M dimensions
- Width: 492 pixels
- Height: 266 pixels
4 Widget B
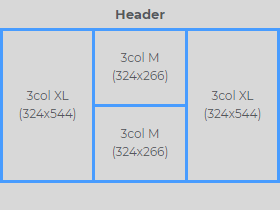
3col XL dimensions
- Width: 324 pixels
- Height: 544 pixels
3col M dimensions
- Width: 324 pixels
- Height: 266 pixels
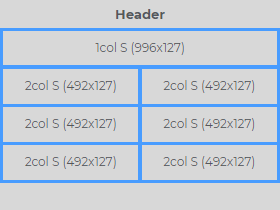
4 Widget C
1col S dimensions
- Width: 996 pixels
- Height: 127 pixels
5 Widget A
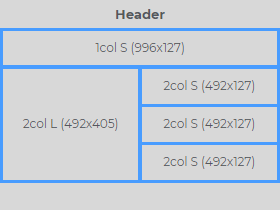
1col S dimensions
- Width: 996 pixels
- Height: 127 pixels
2col L dimensions
- Width: 492 pixels
- Height: 405 pixels
2col S dimensions
- Width: 492 pixels
- Height: 127 pixels
5 Widget B
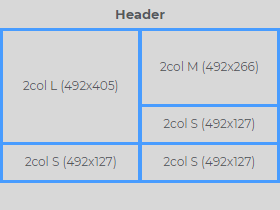
2col L dimensions
- Width: 492 pixels
- Height: 405 pixels
2col M dimensions
- Width: 492 pixels
- Height: 266 pixels
2col S dimensions
- Width: 492 pixels
- Height: 127 pixels
6 Widget
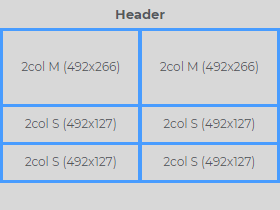
2col M dimensions
- Width: 492 pixels
- Height: 266 pixels
2col S dimensions
- Width: 492 pixels
- Height: 127 pixels
7 Widget
1col S dimensions
- Width: 996 pixels
- Height: 127 pixels
2col S dimensions
- Width: 492 pixels
- Height: 127 pixels
8 Widget
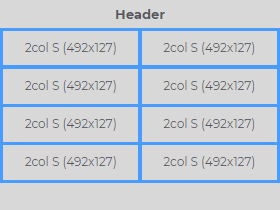
2col S dimensions
- Width: 492 pixels
- Height: 127 pixels
Background Image
Image displayed in the background of the screen.
Promotion Mode
Kiosk workflows that contain a Unified Menu screen, include the ability to enable Promotion Mode for the Welcome screen. When Promotion Mode is enabled, a button (navigates to the Unified Menu screen) is available at the bottom of the screen.
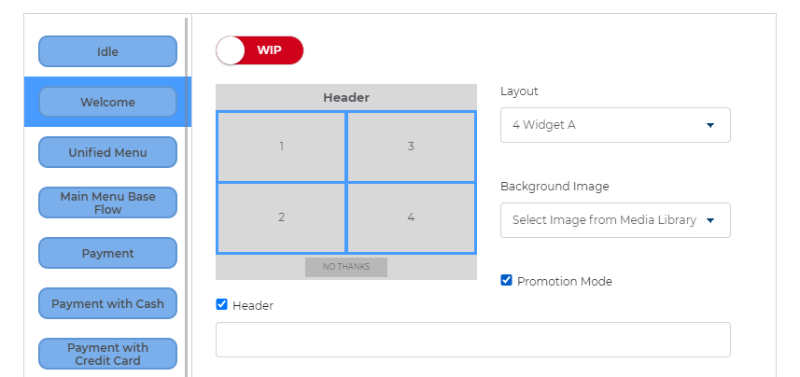
Note: If the workflow doesn't include the Unified Menu screen, Promotion Mode is disabled for the Welcome screen..
Header
Text that displays in the top section of the kiosk screen.
Add Action
Use the function to add audio to the kiosk screen.
Unified Menu
The Main Selection screen after the Welcome screen that allows users to navigate to the Single Wash Menu, Membership Menu, or the Prepaid/Giftcard Menu.
Main Menu Base Flow
Provides users with easy access to various options and functionalities, such as viewing services, selecting products, and accessing account information.
Payment
Secure interface where users can complete their transactions by selecting payment methods, entering necessary information, and confirming their purchases.
Thank You
Closing interface that expresses appreciation to the user for their interaction.
Pull Forward
Guides users on when and how to proceed with their vehicle into the wash tunnel.
Status
Workflows can be available for use at only a single site, select multiple sites, or all sites. However, an organization can prevent all sites from being able to use a workflow through the Status setting.
Active
The workflow can be assigned to a site, and then used at a kiosk terminal.
![]()
Inactive
The workflow can't be assigned to a site.
![]()