Configure Discount Code Printing on Receipts
Use these steps to configure a complimentary discount code to be printed along with your receipt for selling a specific product. Once the code is configured, when a customer purchases the specific product they will receive their sales receipt along with a receipt with the discount code on it to be used at a later time.
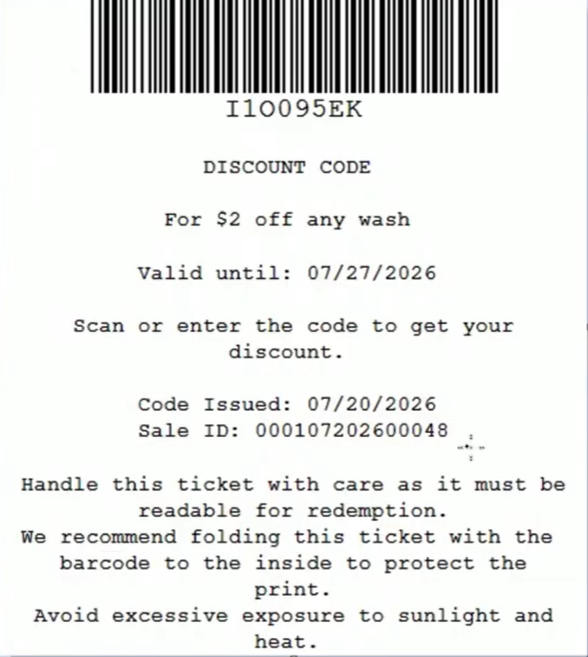
Configuration Steps
Create a Discount
Use the following steps to create a discount. In this example, we configure a discount for $2 off any wash.
- Log In to Patheon Portal.
- Select Configuration. The Configuration page opens.
- Select Discounts. The discounts panel opens.
- Select . The add discount (1 conditions) panel opens.
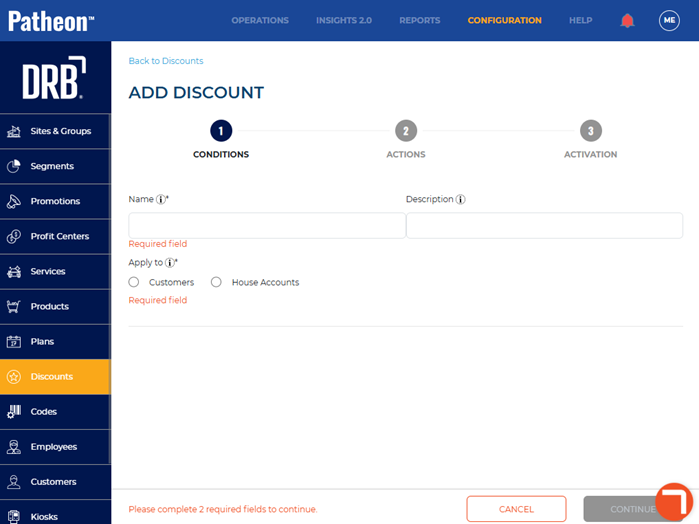
- In Name*, enter a name for the discount, such as $2 off any wash.
- In Apply to*, select Customers.
- In Application Type*, select Coupon. The conditions section opens.
- Navigate to the conditions section.
- Select Product type(s). The Product Type(s) settings open.
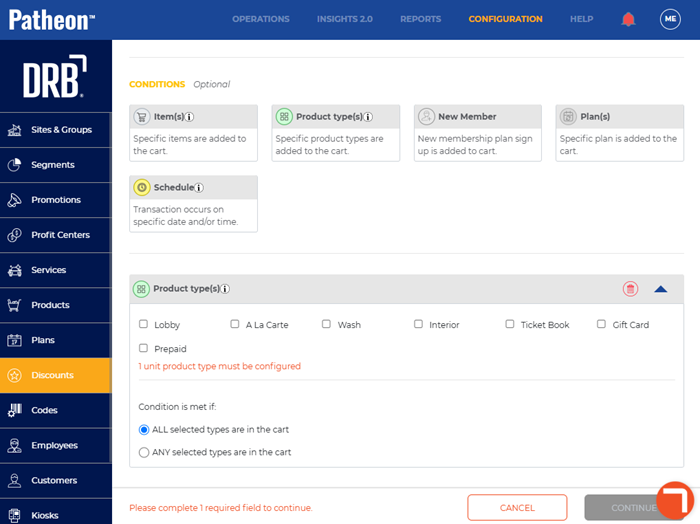
- In Product type(s), select Wash.
- In Condition is met if:, select ANY selected types.
- Select . The add discount (2 actions) panel opens.
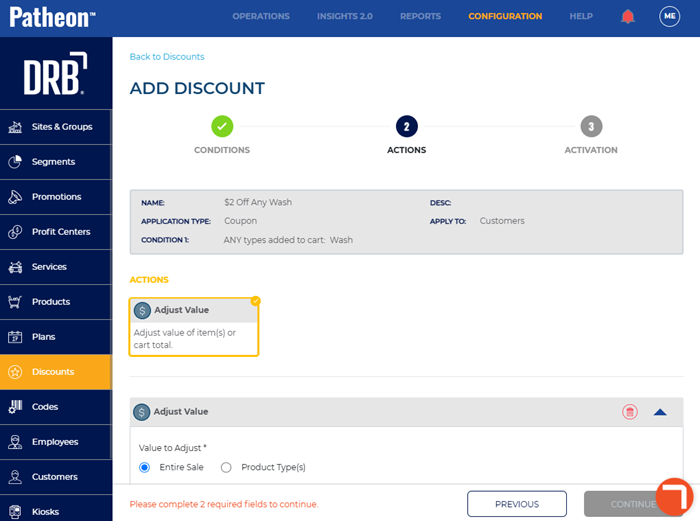
- Navigate to the Adjust Value settings.
- In Value to Adjust*, select Product Type(s).
- In Product Type(s), select Wash.
- In Type of Discount*, select Fixed.
- In Discount Value (USD)*, enter the price of the discount in US dollars, such as 2 for $2 off of the wash.
- In Discount Value (CAD)*, enter the price of the discount in Canadian dollars, such as 2.82 for $2 off the wash.
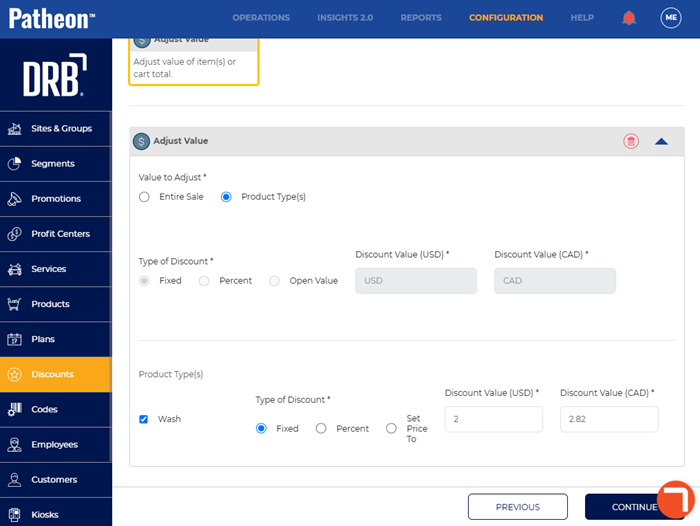
- Select . The add discount (3 activation) panel opens.
- In Show on POS and Kiosk Staff Screen, select No.
- Select . The Create Coupon Code? dialog opens.
- Select . The add code panel opens.
- In Type*, select Single code. The discount code settings open.
- In Discount Code*, enter the discount code, such as 2OFFWASH. Note: This code will not be used. The system will create its own code.
- In Unlimited Redemptions*, select No.
- In Redemption Limit (per code)*, enter 1.
- Select Select All Ungrouped Sites.
- Select . The discount detail panel opens.
Generate a Code
Use these steps to create and generate a promotion code for the discount configured above. Note: You can combine discount codes. For this example, we are generating only one discount code.
- Log In to Patheon Portal.
- Select Configuration. The Configuration page opens.
- Select Promotions. The promotions panel opens.
- Select . The add promotion (1 Conditions) panel opens.
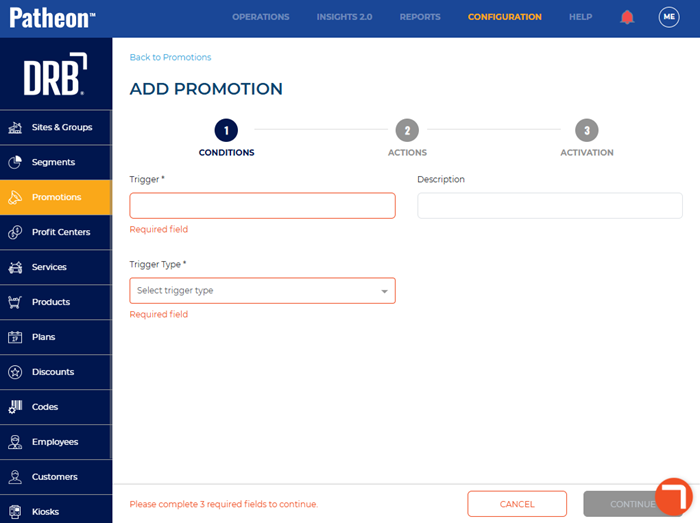
- In Trigger*, enter the name for the trigger, such as $2 Code with Best.
- In Trigger Type*, select Sale tendered.
- In Audience*, select Any customer.
- In Platform*, select where the customers can purchase their washes from, such as XPT and POS.
- Navigate to the conditions section.
- Select Product(s). The Product(s) settings open.
- In Specific Product(s)*, select add (
 ) next to the wash the customer must purchase to receive the discount code, such as Best Wash.
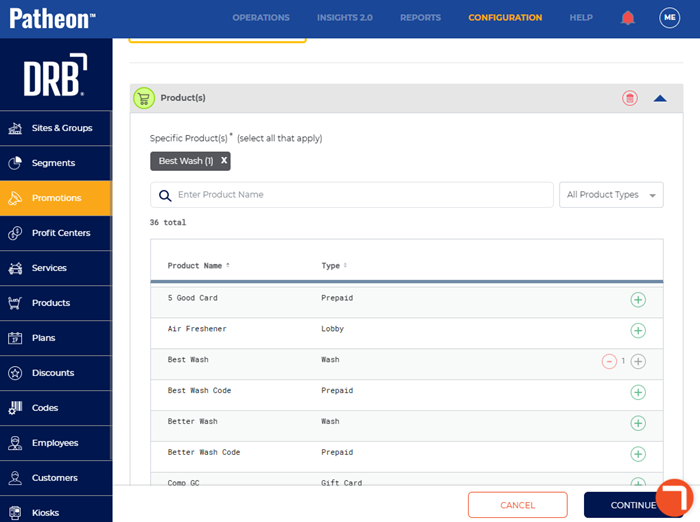
- Select Condition is met if ALL of the selected products are in the cart.
- Select . The add promotion (2 actions) panel opens.
- Select Generate Discount Code. The Generate Discount Code settings open.
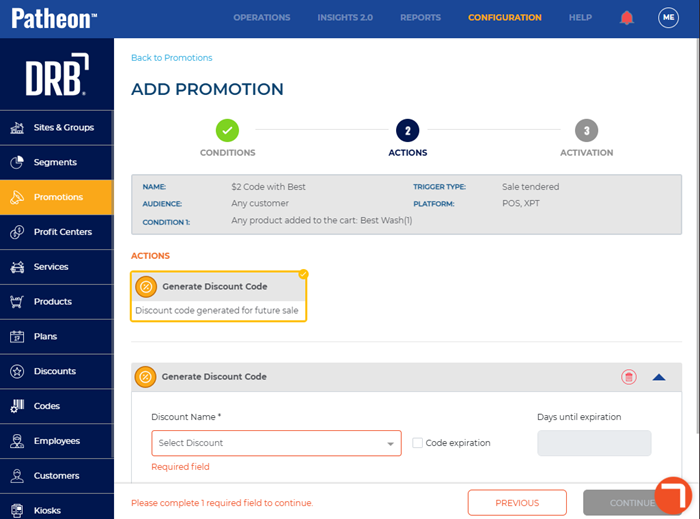
- In Discount Name*, select the name of the discount created earlier, such as $2 off any wash.
- If you want to set an expiration for the code, select Code expiration.
- In Days until expiration*, enter the number of days the code remains active before expiring, such as 7.
- Select . The add promotion (3 activation) panel opens.
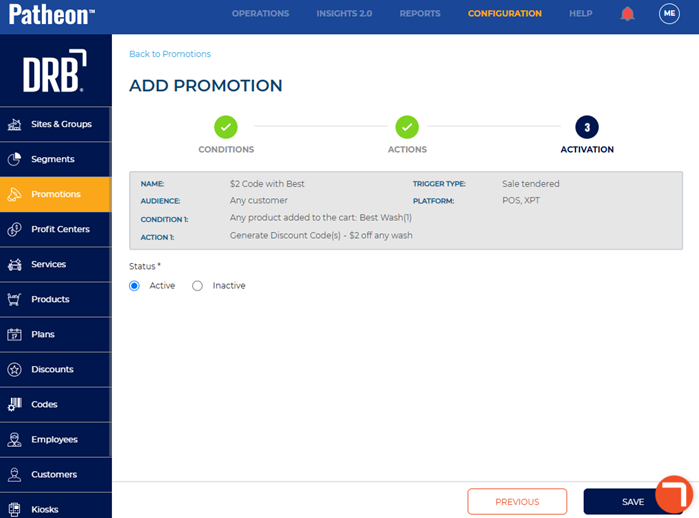
- Select . The Promotion Added dialog opens.
- Select . The activated sites panel opens.
- Select the sites for which the discount codes should be active.
- Select . The promotion details panel opens.