Configure a Receipt Logo
Use these steps to configure a receipt logo. Single-site organizations and multi-site organizations that use the same receipt logo for all sites, only need to configure a default receipt logo. Multi-site organizations with sites that use different receipt logos, can configure site-specific receipt logos for those sites that use a different receipt logo.
Receipt Logo Specifications
- File Type: Receipt logos must be a JPEG, JPG, or PNG file.
- File Size: Receipt logo files should be 150 KB or less. Important: Sites that use tablet terminals should use smaller file sizes (25 KB, for example) for optimal performance over WiFi networks.
- Image Size: Images can be any size; as they automatically scale to fit when printed. However, large images aren't generally suitable for receipt logo use. For best results, the image width should be 1024 pixels or less.
- Color: Receipt logo images can be black and white, grayscale, or color (color will print as grayscale).
- Transparency: Transparent formatting in PNG images will print the entire logo area dark. To prevent this, edit the image, and fill all transparent formatting with white color before uploading it. Note: JPEG and JPG don't support transparent formatting so this isn't an issue for those file types.
- Aspect Ratio: The receipt logo upload dialog provides a cropping tool to crop the image to any aspect ratio before uploading it.
Configure Default Receipt Logo
This is the only receipt logo configuration required for a single-site organization, or a multi-site organization that uses the same receipt logo for all of its sites. If a specific site within a multi-site organization needs to use a different logo, configure a default logo for all sites and then use the steps in the next section to configure a site-specific receipt logo.
- Open Patheon Portal.
- Select Configuration.
- Select Customization. The Receipts panel opens.

- Navigate to the bottom of the panel.

- Select ADD IMAGE. An Open file selection dialog opens.
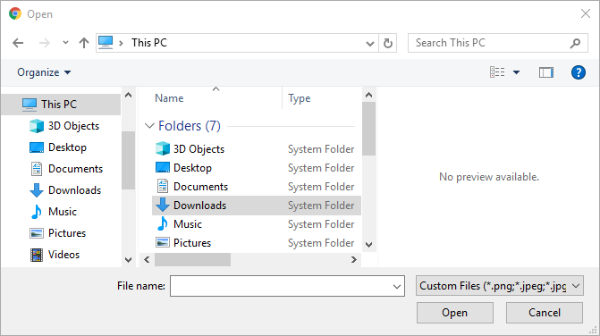
- Browse to the image file and select it. The file's name appears in the File name field.
- Select Open. The Open dialog closes and a preview of the image appears in a Crop Your Image dialog.
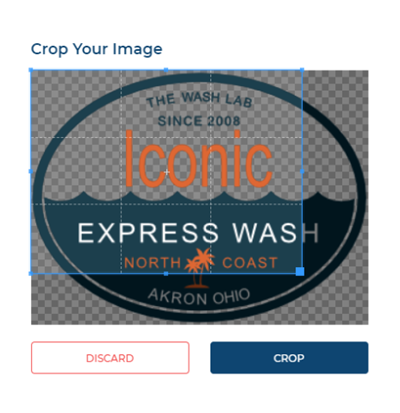
- Adjust the image's dimensions with the provided cropping tool.
- Select Crop. The image is cropped, the Crop Your Image dialog closes, and the Customization panel is displayed with a thumbnail of the cropped image.
- Select . The changes are saved.
Configure Site-Specific Receipt Logo
Use these steps to configure a different receipt logo (than the default receipt logo) for a site that belongs to a multi-site organization.
- Open Patheon Portal.
- Select Configuration.
- Select Sites. The Sites panel opens.
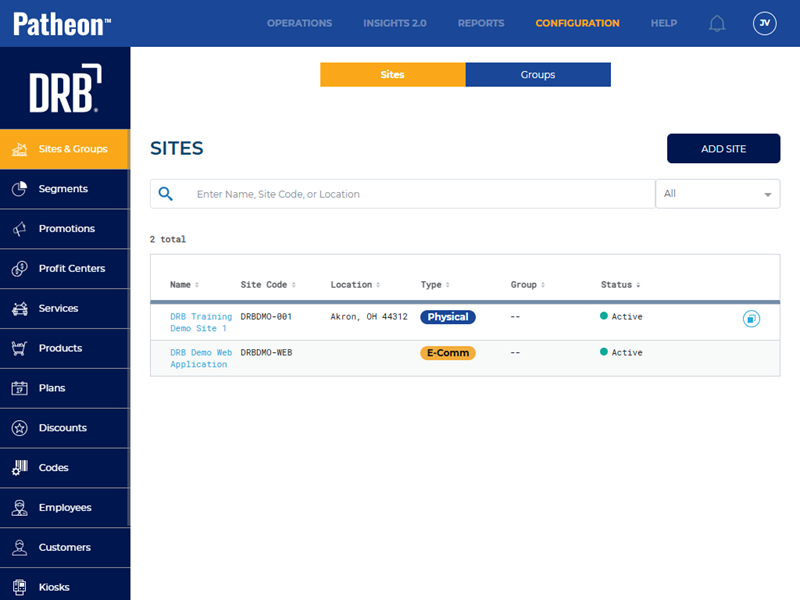
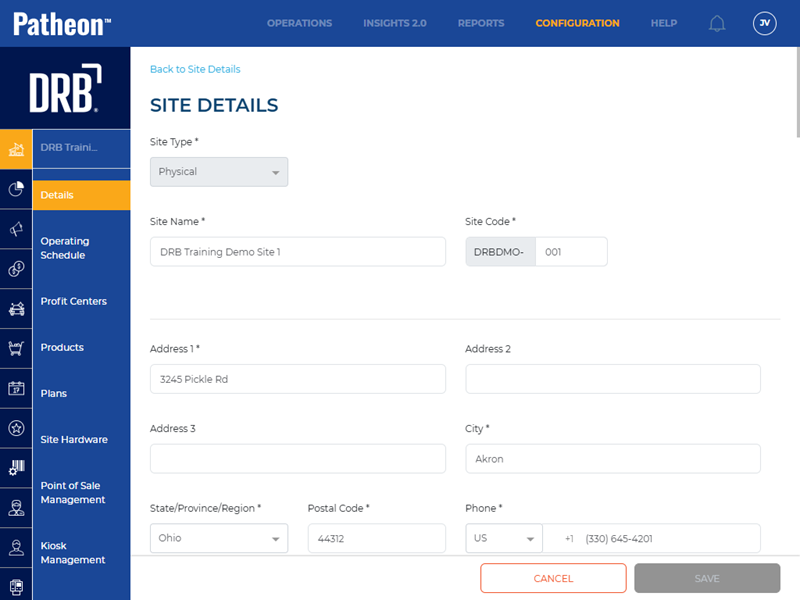
- In the sites list, select the Name of the site that requires a different receipt logo. The Site Overview panel opens.
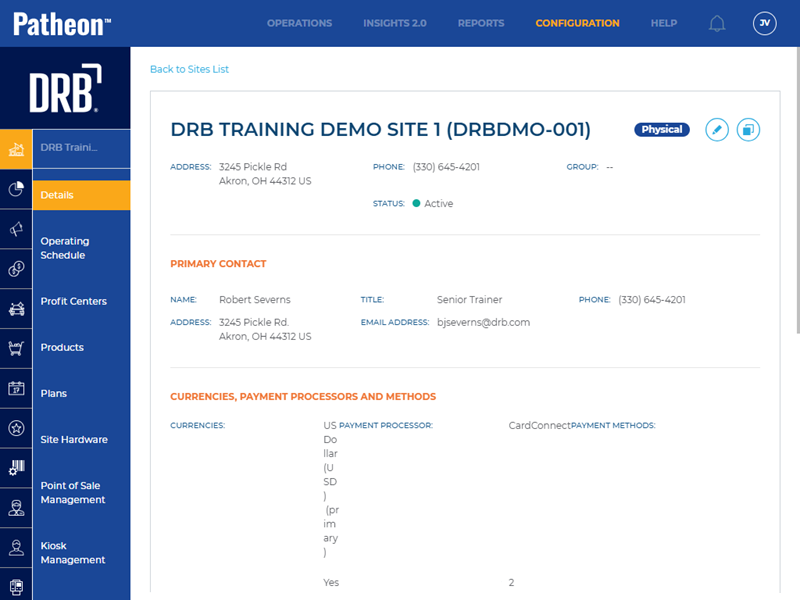
- Select the edit icon (
 ) in the top right corner. The Site Details panel appears.
- Navigate to the Receipt Header Image section.
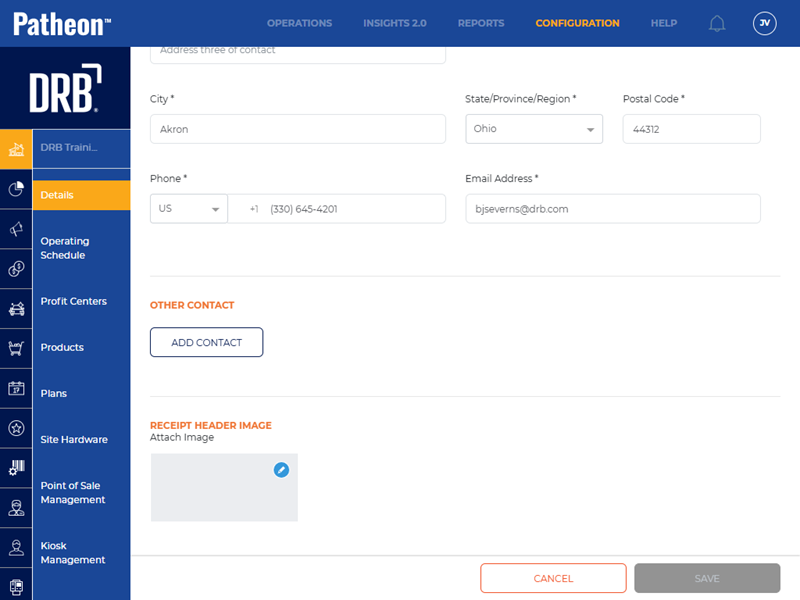
- Select the edit icon (). An Open file selection dialog opens.
- Browse to the image file and select it. The file's name appears in the File name field.
- Select Open. The Open dialog closes and a preview of the image appears in a Crop Your Image dialog.
- Adjust the image's dimensions with the provided cropping tool.
- Select CROP. The image is cropped, the Crop Your Image dialog closes, and a thumbnail of the cropped image is displayed under the Receipt Header Image section.
- Select . The changes are saved.