Record a Cash Deposit
Use these steps to record a cash drawer deposit. Do this when the amount of cash in a drawer exceeds the amount needed to provide change to customers.
Record by Denomination Count
- Log in to the cashier application.
- Select Cash Balance. The Cash Balance panel opens. Note that only the function and function are enabled.
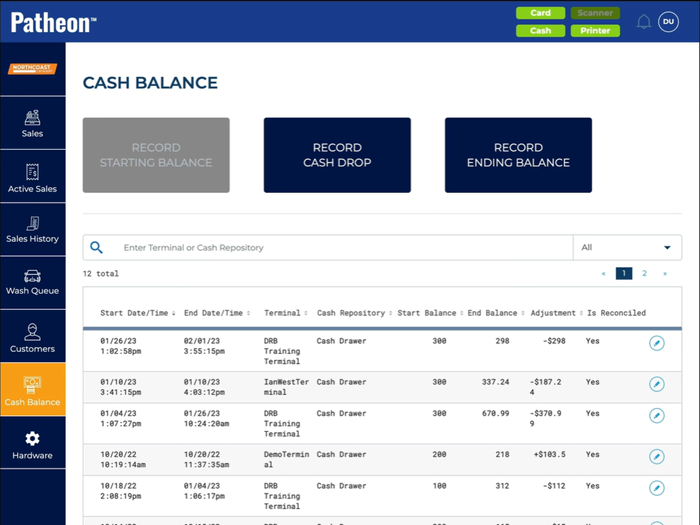
- Select . The Cash Drop panel opens.
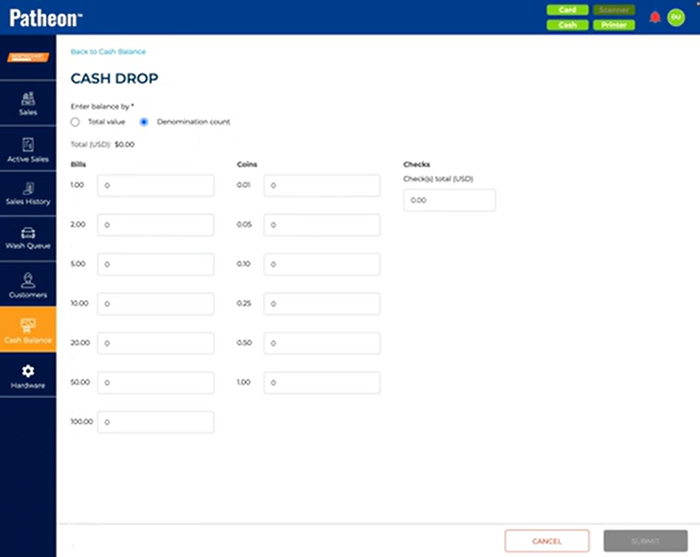
- Select Denomination count. The Cash Drop panel displays specific entry fields for Bills, Coins, and Checks.
- For Bills, enter the quantity of each bill removed from the cash drawer: 1.00, 2.00, 5.00, 10.00, 20.00, and 50.00.
- For Coins, enter the quantity of each coin removed from the cash drawer: 0.01, 0.05, 0.10, 0.25, 0.50, and 1.00.
- For Checks, enter the total value of all checks removed from the cash drawer, for example, 100.00.
- Select . An Are you sure? dialog opens, stating, "Cash drop for <Terminal Name>: $235.00.".
- Select . The dialog closes, the Cash Drop panel closes, and the Cash Balance panel opens.
- The cashier can open the Sales panel and resume recording sales.
Record by Total Value
- Log in to the cashier application.
- Select Cash Balance. The Cash Balance panel opens. Note that only the function and function are enabled.
- Select . The Cash Drop panel opens.
- Select Total value. The Cash Drop panel displays a single Total (USD)* entry field.
- In Total (USD)*, enter the total value of cash (bills + coins + checks) removed from the cash drawer, for example, 235.
- Select . An Are you sure? dialog opens, stating, "Cash drop for <Terminal Name>: $235.00.".
- Select . The dialog closes, the Cash Drop panel closes, and the Cash Balance panel opens.
- The cashier can open the Sales panel and resume recording sales.