Add a Kiosk Personalized Plan Sale Offer for a Retail Customer
Use the steps below to create a kiosk workflow that provides a personalized plan sale promotion for non-plan customers who have visited at least 2 times in the past 30 days. When the customer is identified by a license plate reader, the alternative plan sale promotion is triggered and displayed for the customer. The customer can accept the plan sale promotion and proceed with the purchase, or decline it and proceed with the standard kiosk workflow.
Note: This configuration can be customized for different visit histories, for example, 2 washes of any kind in the past 30 days, 2 good washes in the past 30 days, 3 good washes in the past 30 days, 2 better washes in the past 30 days, etc.
See Kiosk Personalized Promotions to learn more about kiosk terminal personalized promotions.
Tools Required
- License plate recognition
- Kiosk terminal(s)
- Patheon Promotion Flows feature enabled. This feature is enabled by default for all organizations with license plate recognition.
Configuration Steps
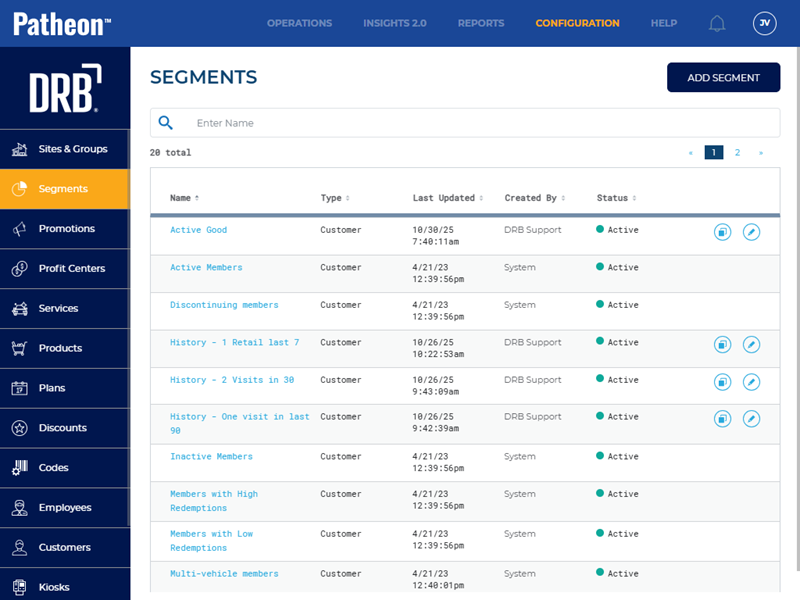
Create a "History - 2 Visits in 30" Customer Segment
Use the following steps to create a customer segment that tracks non-plan customers who have visited the site at least 2 times in the past 30 days.
- Open Patheon Portal.
- Select Configuration. The Configuration page opens.
- Select Segments. The Segments panel opens.
- Select . The Add Segment panel opens.
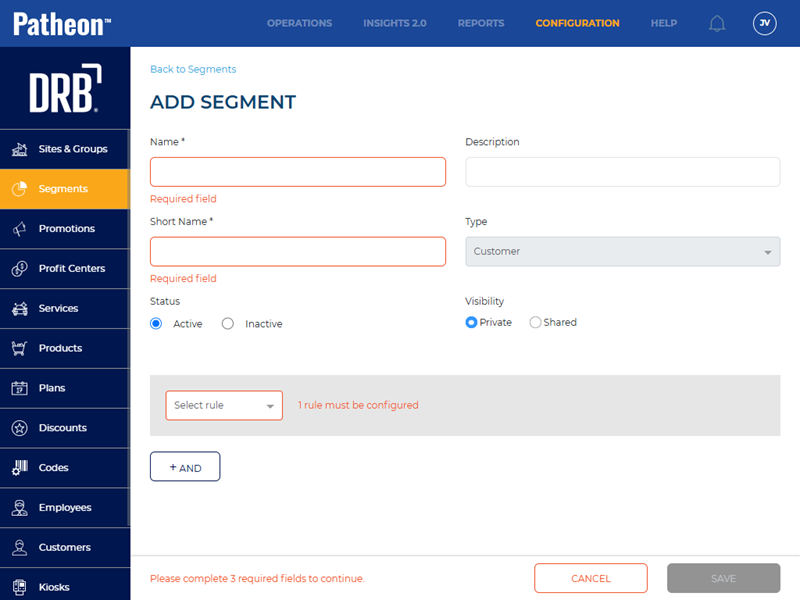
- In Name*, enter History - 2 Visits in 30.
- In Short Name*, enter 2VisitsIn30.
- In Status, select Active.
- In Visibility, select Shared.
- In Select rule, select Transaction. The Has transaction, Any, Date, Today, and Quantity settings open.
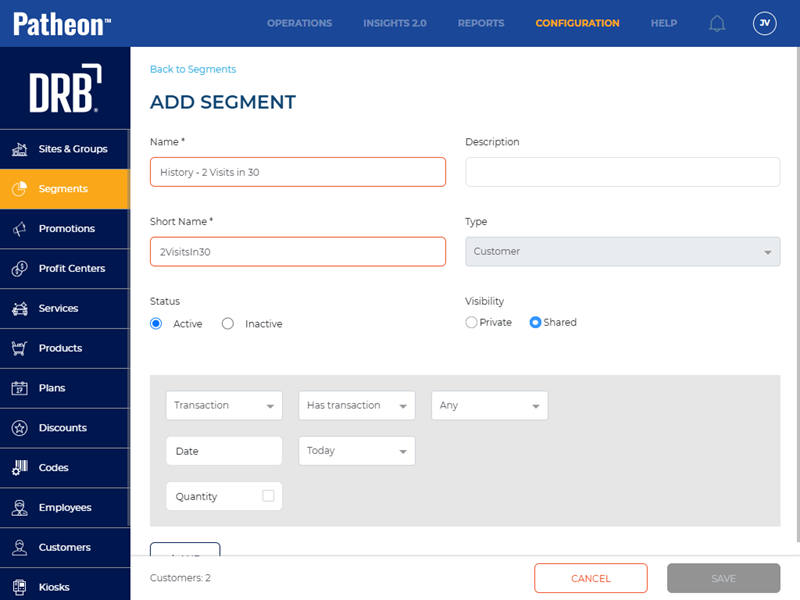
- Select Has transaction.
- Select Any.
- Select Date.
- In Today, select Last 30 Days.
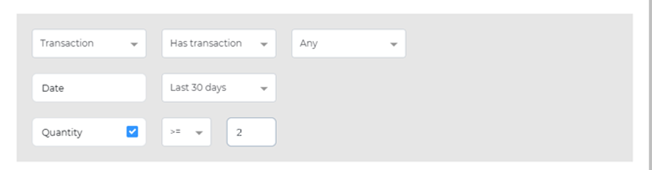
- Select Quantity. The >= and quantity value settings open.
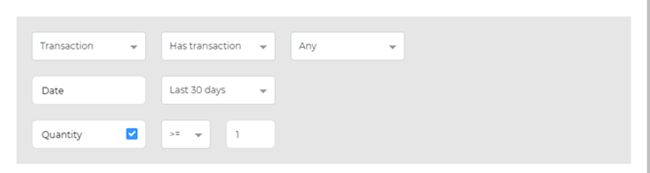
- Select >=.
- In the quantity value setting, replace the 1 with 2.
- Select . The customer segment is saved.
Create a Trigger for the "History - 2 Visits in 20" Customer Segment
Use the following steps to create an On customer recognition trigger for the History - 2 Visits in 30 customer segment.
- Open Patheon Portal.
- Select Configuration. The Configuration page opens.
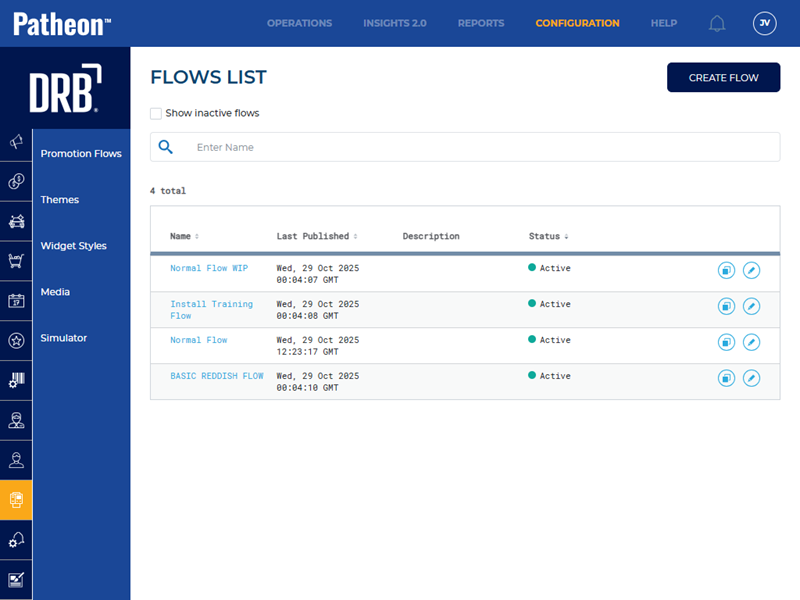
- Select Kiosks. The Flows List panel opens.
- Select Promotion Flows. The Promotion Flows panel opens.
- Select Triggers. The Triggers panel opens.
- Select . The Create Trigger panel opens.
- In Name*, enter History - 2 in 30.
- In Type, select On customer recognition.
- In Audience, select Existing customers.
- Navigate to the Conditions section.
- Select Segment. A Segment section opens.
- In Choose segment*, select History - 2 Visits in 30.
- In Status, select Active.
- Select .
Create a "Plan Conversion Promotion" Promotion Flow for the "History - 2 in 30" Trigger
- Open Patheon Portal.
- Select Configuration. The Configuration page opens.
- Select Kiosks. The Flows List panel opens.
- Select Promotion Flows. The Promotion Flows panel opens.

- Select . The Create Flow panel opens.
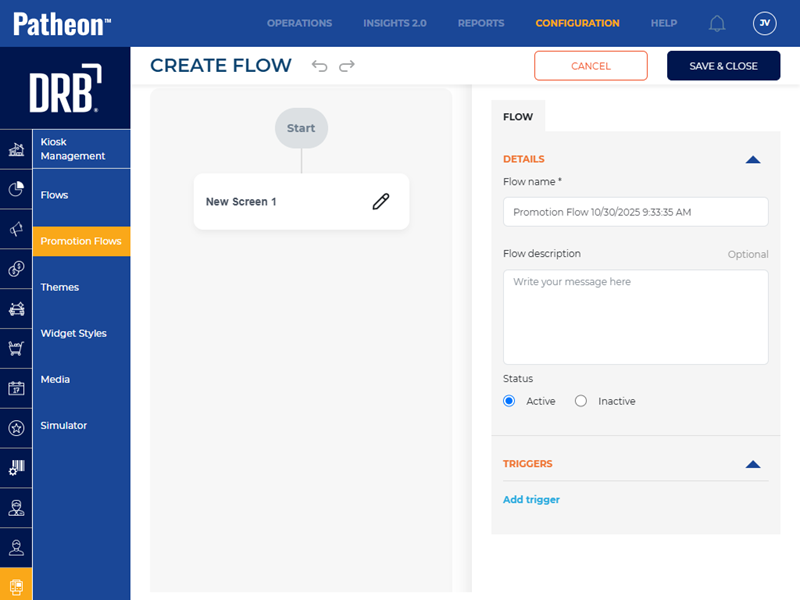
- Navigate to the tab.
- Navigate to the Details section.
- In Flow name*, enter 3 - Plan Conversion Promotion.
- In Status, select Active.
- Navigate to the Triggers section.
- Select Add trigger. The Select Trigger* setting opens.
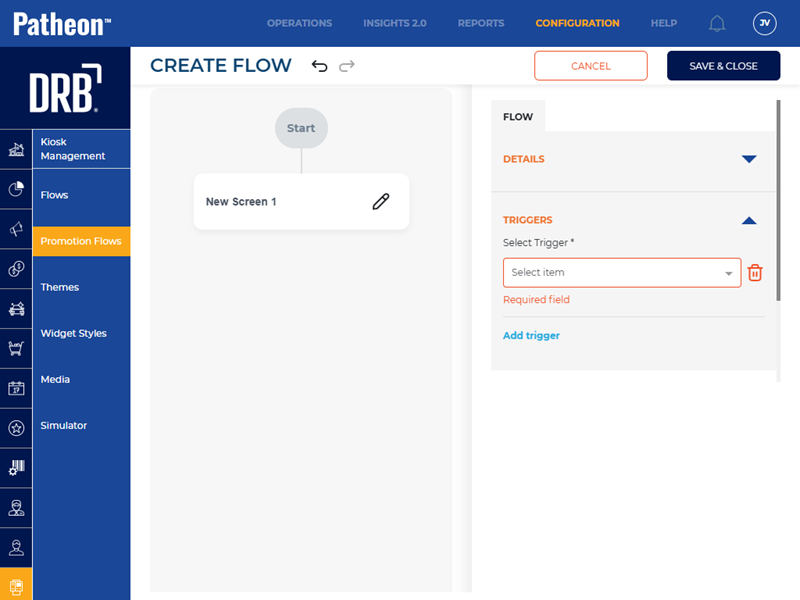
- In Select Trigger*, select History - 2 in 30. This is the name of the trigger created in the previous steps.
- Navigate to the screen design panel.
- For New Screen 1, select Edit. The New Screen 1 panel opens.
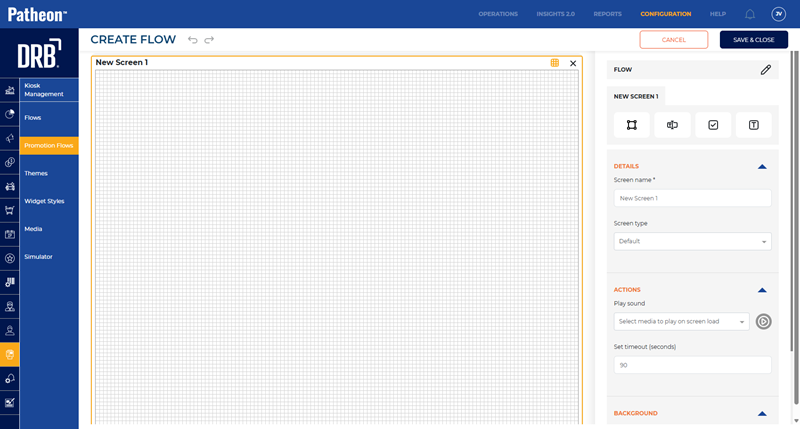
- Navigate to the tab.
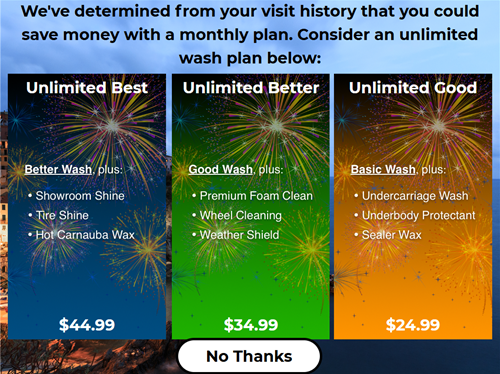
- Use the Details section, Actions section, and Background section to configure the new club plan upsell promotion screen, with widgets for each plan sale option.
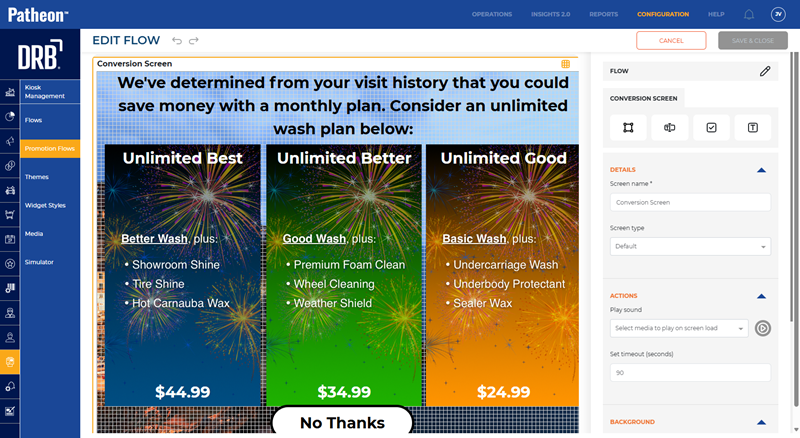
- Add a No Thanks button to navigate to a new screen or use the widget form actions Decline Promotion type to exist the personalized upsell screen and open the unified menu.
- Select . The Promotion Flows panel opens.
- Select Prioritize. The promotion flows priority editor opens.
- Set the priority for the personalized promotion flow. It should be higher (e.g., 3), relative to the other promotion flows.