Add a Kiosk Personalized Welcome Screen
Use the steps below to create a kiosk workflow that provides an alternative, personalized kiosk welcome screen based on the license plate reader at a kiosk terminal identifying a customer who belongs to a specific customer segment. For example, a site can configure a welcome screen that is only displayed for previous plan members when they're identified by the license plate reader at a kiosk terminal.
See Kiosk Personalized Promotions to learn more about kiosk terminal personalized promotions.
Tools Required
- License plate recognition
- Kiosk terminal(s)
- Patheon Promotion Flows feature enabled. This feature is enabled by default for all organizations with license plate recognition.
Configuration Steps
Important: A site can create multiple customer segments, for example a Plan Terminated segment, Plan Expired segment, and Plan Discontinued segment, and then set up a corresponding trigger for each (Plan Terminated trigger, Plan Expired trigger, and Plan Discontinued trigger) and then assign all three triggers to the same personalized welcome screen.
Create a "Plan Terminated" Customer Segment
- Open Patheon Portal.
- Select Configuration. The Configuration page opens.
- Select Segments. The Segments panel opens.
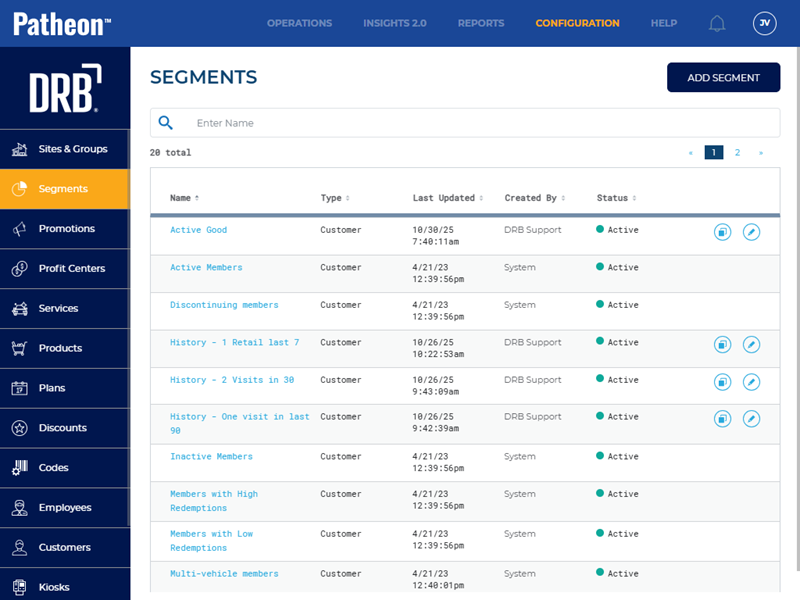
- Select . The Add Segment panel opens.
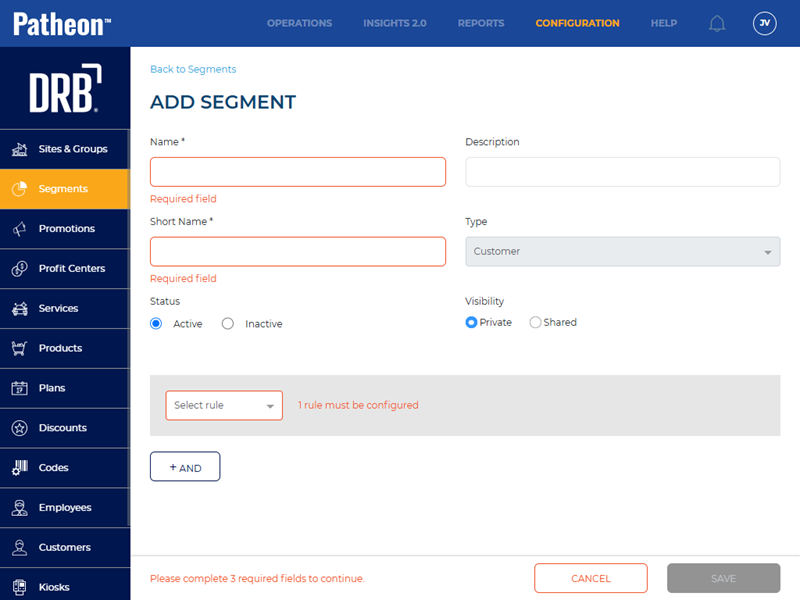
- In Name*, enter Plan Terminated.
- In Short Name*, enter Plan Term.
- In Status, select Active.
- In Visibility, select Shared.
- In Select rule, select Customer.
- Select Has name.
- Select Yes.
- Select . The customer segment is saved.
- Repeat these steps to create a Plan Expired customer segment and Plan Discontinued customer segment if needed.
Create a Trigger
- Open Patheon Portal.
- Select Configuration. The Configuration page opens.
- Select Kiosks. The Flows List panel opens.
- Select Promotion Flows. The Promotion Flows panel opens.
- Select Triggers. The Triggers panel opens.
- Select . The Create Trigger panel opens.
- In Name*, enter Customer Recognition - Any.
- In Type, select On customer recognition.
- In Audience, select Existing customers.
- In Status, select Active.
- Select .
Create a "Plan Conversion Promotion" Promotion Flow for the "Customer Recognition - Any" Trigger
- Open Patheon Portal.
- Select Configuration. The Configuration page opens.
- Select Kiosks. The Flows List panel opens.
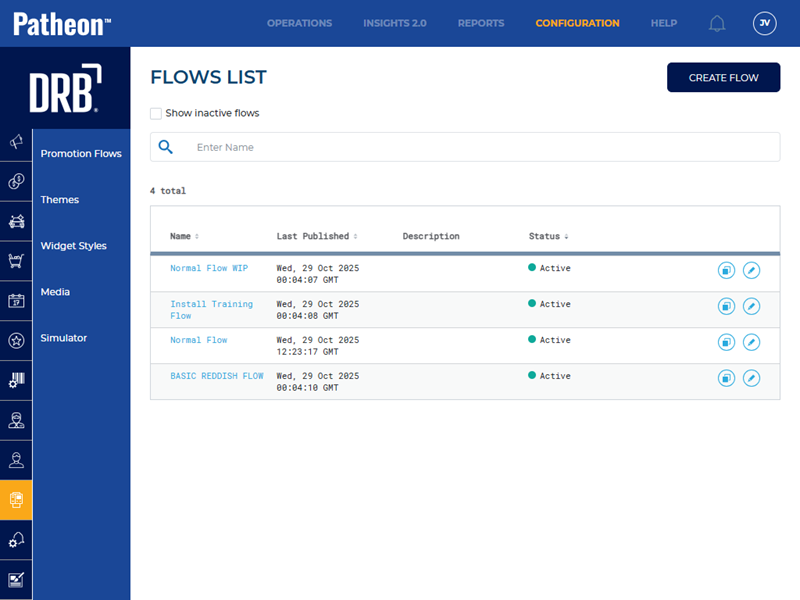
- Select Promotion Flows. The Promotion Flows panel opens.

- Select . The Create Flow panel opens.
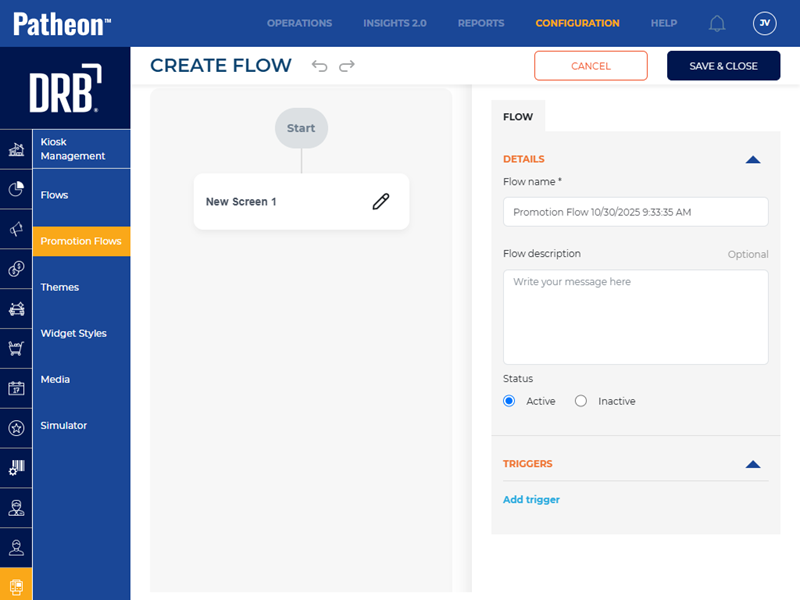
- Navigate to the tab.
- Navigate to the Details section.
- In Flow name*, enter 2-Personalized Welcome.
- In Status, select Active.
- Navigate to the Triggers section.
- Select Add trigger. The Select Trigger* setting opens.
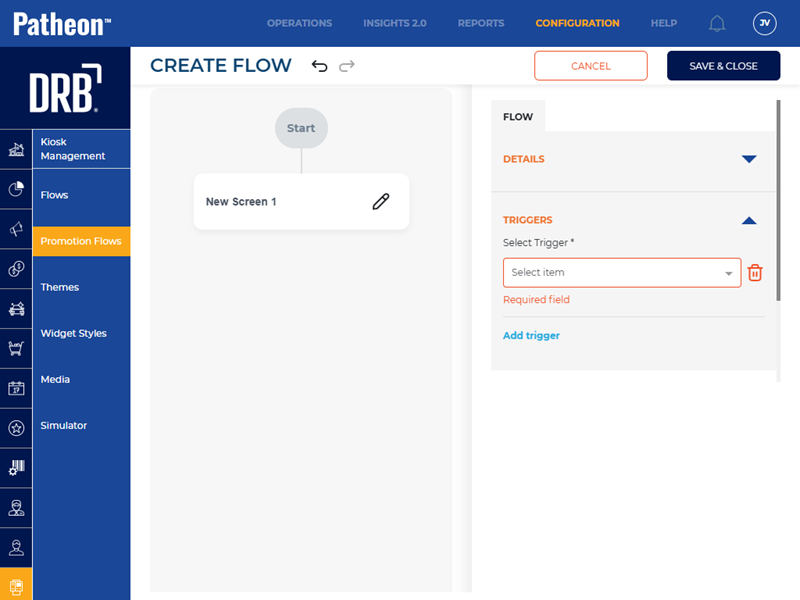
- In Select Trigger*, select Customer Recognition - Any. This is the name of the trigger created in the previous steps.
- Navigate to the screen design panel.
- For New Screen 1, select Edit. The New Screen 1 panel opens.
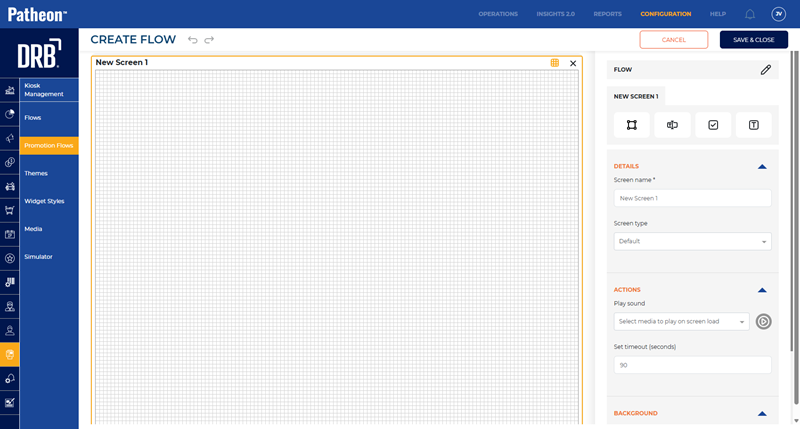
- Navigate to the tab.
- Use the Details section, Actions section, and Background section to configure the new personalized welcome screen, with widgets for each plan sale option.

- Add a No Thanks button to navigate to a new screen or use the widget form actions Decline Promotion type to exist the personalized upsell screen and open the unified menu.
- Select . The Promotion Flows panel opens.
- Select Prioritize. The promotion flows priority editor opens.
- Set the priority for the personalized welcome screen promotion flow. It should be higher (e.g., 2), relative to the other promotion flows.