Change Receipt Printer Density
Use the following steps to change the print density for a kiosk terminal receipt printer in Patheon Portal. The minimum setting is 0 and the maximum setting is 225. The optimum setting depends on thermal paper type and outside temperature. After changing the density, print a test receipt from the kiosk terminal to determine whether the new setting is acceptable.
Note: A kiosk terminal receipt printer density can only be changed in Patheon Portal. It can't be changed from the kiosk terminal.
- Log in to Patheon Portal.
- Select Configuration.
- Select Sites & Groups. The Sites panel opens.
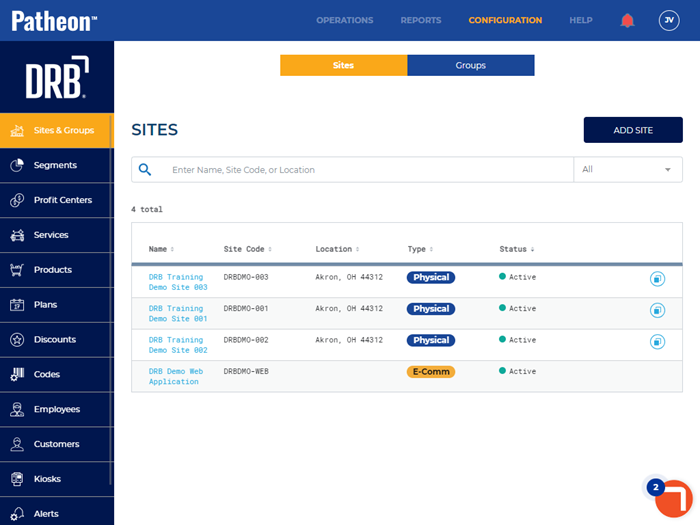
- Under Name, select the site where the kiosk terminal is located. The Site Overview panel opens.
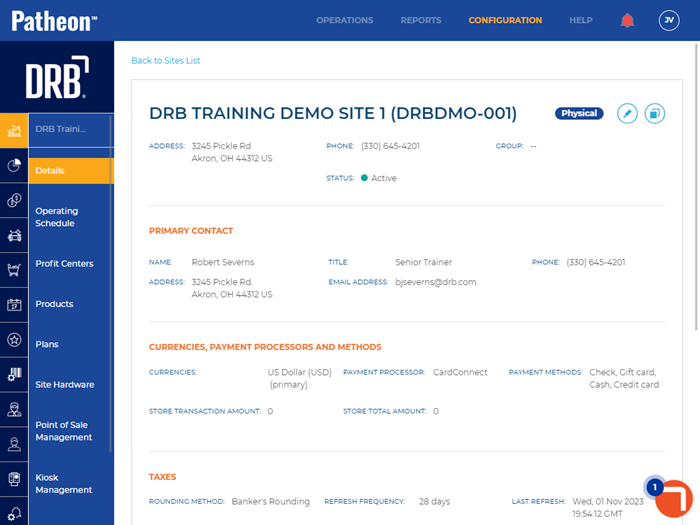
- Select Site Hardware. The Site Hardware panel opens.
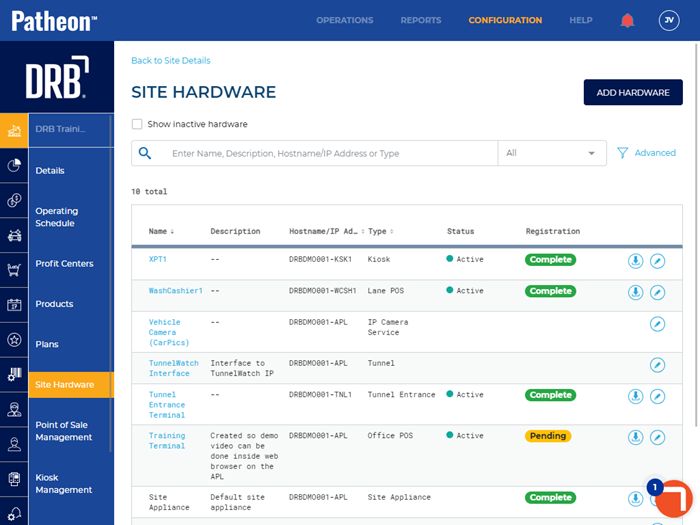
- Locate the kiosk terminal in the hardware list.
- Select edit (
 ) for the kiosk terminal. The Kiosk Details panel opens.
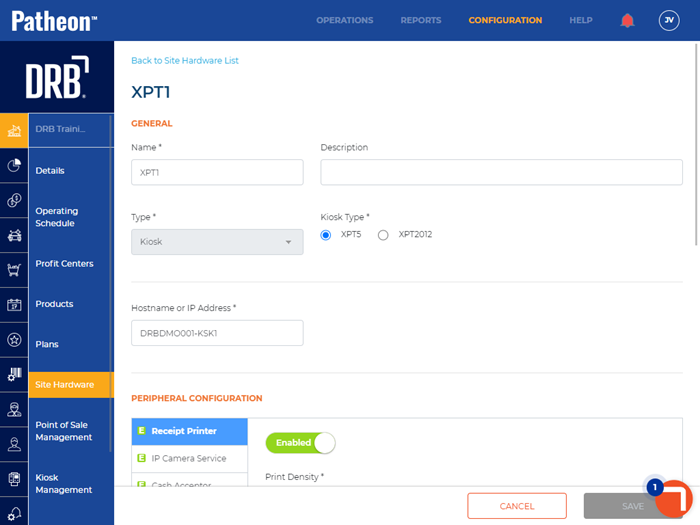
- Navigate to the Peripheral Configuration section.
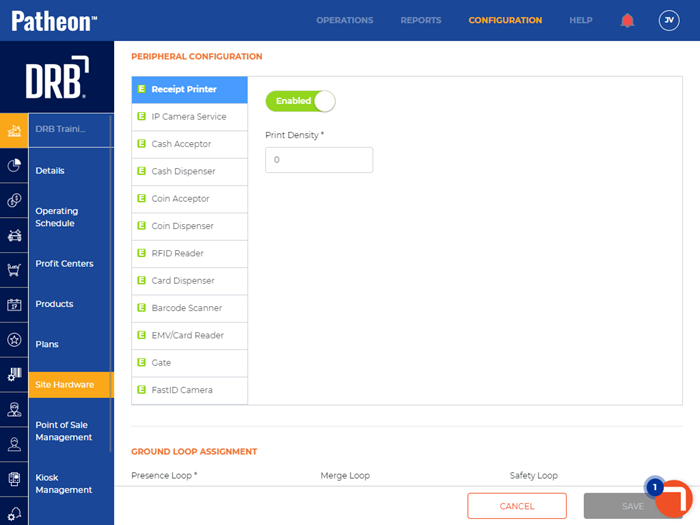
- Select Receipt Printer.
- In Print Density*, enter a value 0-225.
- Select .
- Go to the kiosk terminal and print a test receipt.
- Adjust the density and test until the setting is acceptable.