Look Up a Sale
Use these steps to look up a previous sale from the cashier terminal Sales History panel. From here, staff can void a product in a sale, void the sale or re-print a receipt.
Note: The Sales History panel lists sales newest to oldest, by default.
- Log in to the cashier application.
- Select Sales History. The Sales History panel opens.
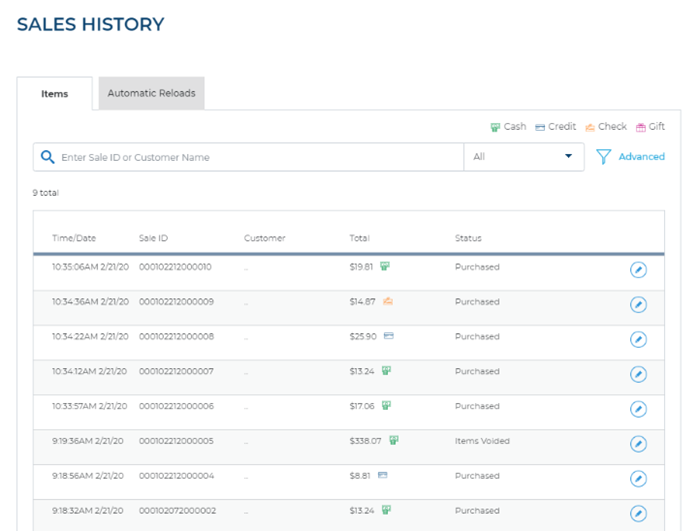
- Search for a sale using part or all of the sale ID or customer name assigned to it. For example, a search for 3 would includes sales with sale IDs of 000102212000003, 300102212000000, and 0003022120000000.
- Select Sale Id or Customer Name from the drop-down next to the search bar to narrow the results.
- Select the Filter function to open filters for site (All Sites or Current Site), status (All Statuses, Plan (purchases and redemptions), Complete, Refund (generic cash refunds only), or Void (voided sales and voided products)), and time (specific date or date range).
- Select a sale's edit (
 ) icon. The Sale ID panel opens.
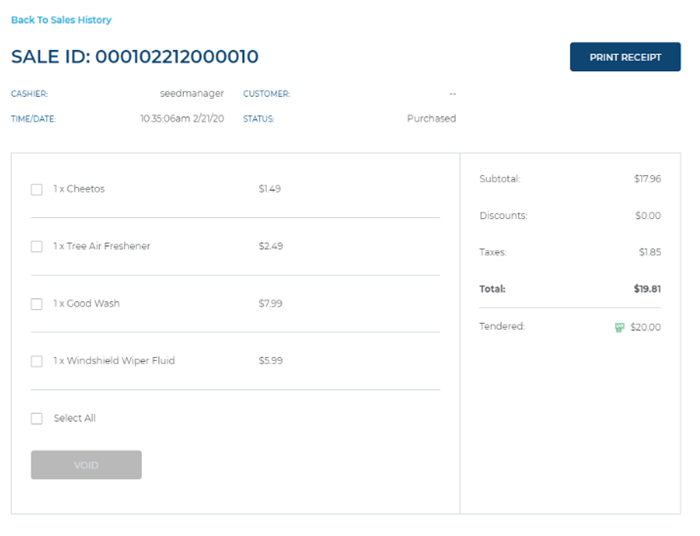
- Review the sale and void a product in a sale, void the sale, re-print a claim check receipt, or re-print a receipt if necessary.